🛠️ Toolbar
The toolbar is located at the top of the workspace, providing quick access to project management and common functions.
5.1 Project Info Area
Project Name Display - Displays the name of currently open project
Return to Home - Click "Back" button or arrow left of project name - Return to project management home page - Will prompt to save unsaved changes
Save Status Indicator - Green checkmark: All changes saved - Yellow dot: Unsaved changes - Saving: Currently saving, shows loading animation
5.2 Edit Operations
Undo/Redo
- Undo: Ctrl + Z or click undo button
- Undo previous operation
- Can undo multiple steps continuously
- Redo: Ctrl + Shift + Z or Ctrl + Y or click redo button
- Redo previously undone operation
- Can redo multiple steps continuously
Supported Undoable Operations: - Add/delete components - Modify properties - Move components - Resize - Style modifications
5.3 View Control
Panel Expand/Collapse - Component Panel: Click to toggle display of component library and component tree - Properties Panel: Click to toggle display of properties panel - Collapse panels for more canvas space
View Options - Show Grid: Toggle canvas grid display - Show Guidelines: Toggle guideline display - Show Component Boundaries: Show boundary boxes for all components in canvas
5.4 Resource Manager
The resource manager is used to manage all resource files used in the project.
Image Resources
Add Image 1. Click "Resources" button in toolbar 2. Switch to "Images" tab 3. Click "Add Image" button 4. Select image file (currently only PNG supported) to import
Delete Image 1. Select image in resource list 2. Click "Delete" button
Font Resources
Add Font 1. Click "Resources" button in toolbar 2. Switch to "Fonts" tab 3. Click "Add Font" button 4. Select font file (currently only TTF supported) to import
Font Management 1. Select font in resource list 2. Click "Delete" button
5.5 Preview and Code Generation
Code Preview
View Generated Code: 1. Click "C Language" or "MicroPtyon" button in toolbar
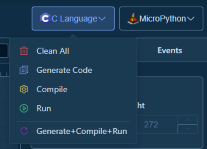
5.6 Archives and History Entry
The toolbar provides an Archives and History button for saving the current version, viewing archived versions, and restoring a selected version.
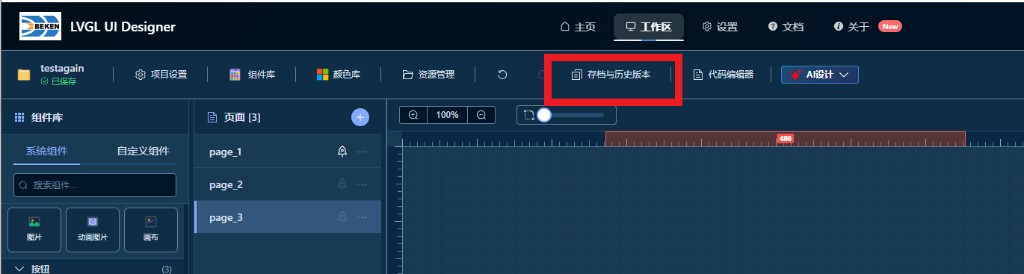
See Archives and History for full instructions.
5.7 AI Design
The toolbar provides an AI Design entry to launch Cursor, Codex, TRAE, or TRAE CN and describe UI changes in natural language.
- Install Cursor, Codex, TRAE, or TRAE CN on your computer first
- MCP and Skill are installed automatically on first use
- After AI edits the canvas, use Save or Rollback at the bottom of the canvas
See AI Design for full instructions and troubleshooting.
Workspace Docs: ← Back to Workspace | Canvas | Components | Tree | Properties | Events | Archives and History | AI Design | Toolbar | Shortcuts